Sizing guidelines
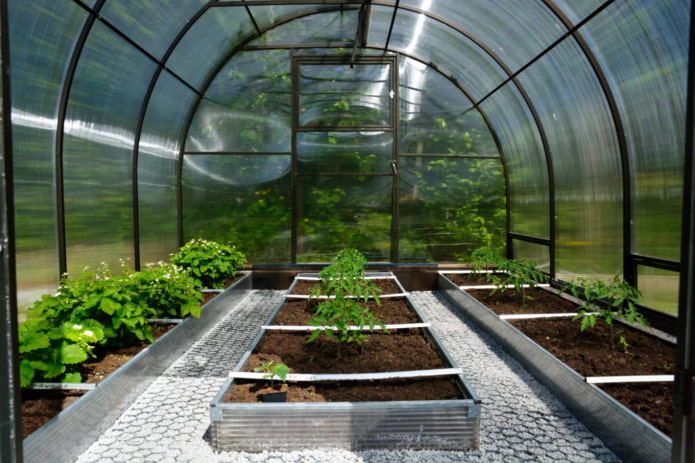
The standard dimensions of greenhouse structures on the site are 3 meters in length, 4-8 meters in width. This area is enough to successfully grow vegetables for one family.
The size of the greenhouse beds depends on what exactly you are going to grow in them:
- Cucumbers... Since the leaves are voluminous, the width of the beds in the greenhouse should be maximum: 100-120 centimeters - in other conditions, the plants will not have enough sunlight.
- Tomatoes... For growing tomatoes in one row, 60 cm is enough, if the variety is tall, you can increase the depth of the garden to 80.
- Pepper... Bell peppers also require 60-70 centimeters of free soil.
- Salad... Useful greens, unlike vegetables, are undemanding to the place of cultivation. Will grow in narrow and wide, deep and shallow boxes.
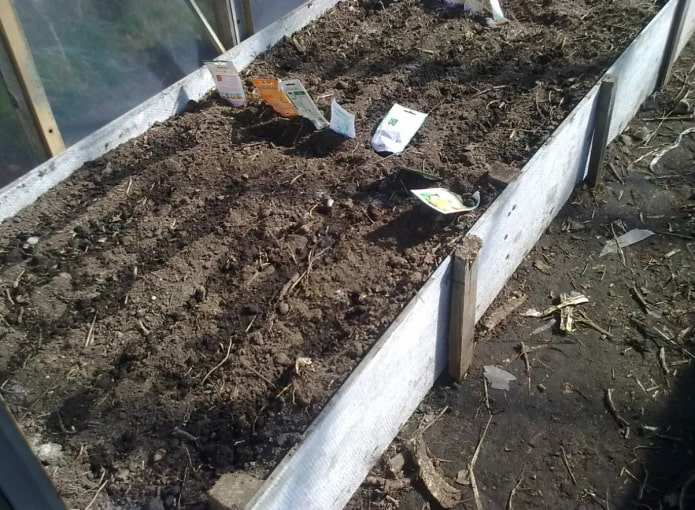
It is not only the length or width that matters, but also the height. The higher the box, the warmer the plants will be in the demi-season (the earlier they can be planted), but in the summer it will be necessary to soak the ground with water more and more often. The lower, the less often you need watering, but such a greenhouse will be good only in the summer. The average generally accepted height of the beds in the greenhouse is 10-30 centimeters.
We will analyze the location of the beds in the greenhouse and their number in one of the following sections, but first of all we will find out what they are made of.
What are the beds made of?
You can make beds in the greenhouse from any improvised or special materials:
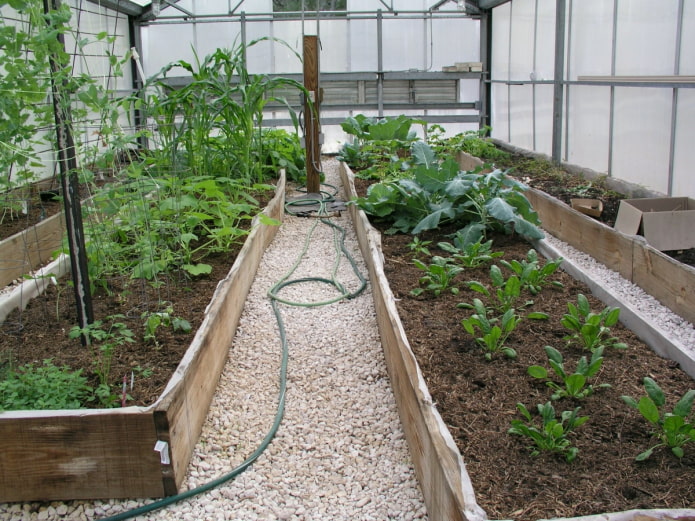
- boards;
- slate;
- bricks;
- wood-polymer composite;
- lawn curb;
- galvanized sheets;
- gabions;
- concrete.
To choose the right material, pay attention to properties... A suitable fence for greenhouse beds should be strong, not afraid of water and not change the composition of the soil.
Important! Although wood is afraid of water, it still remains one of the gardeners' favorite materials. Natural, cheap and easy to process. And so that the walls do not rot from watering and spraying, the wood is treated with protective impregnations, and covered with a film from the inside.
How can the beds be arranged?
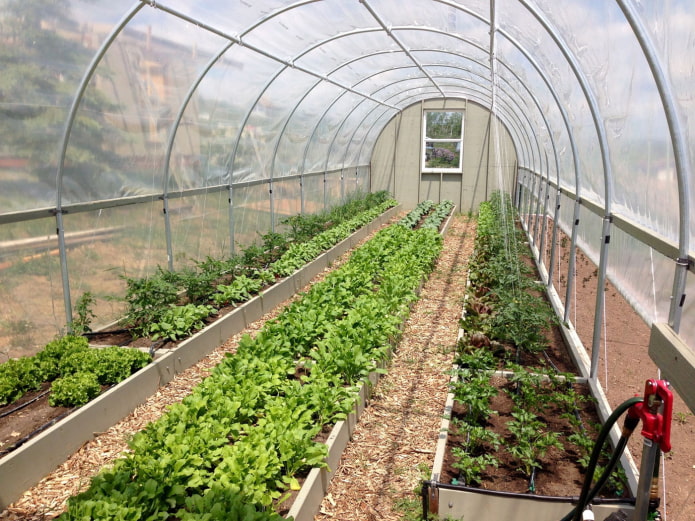
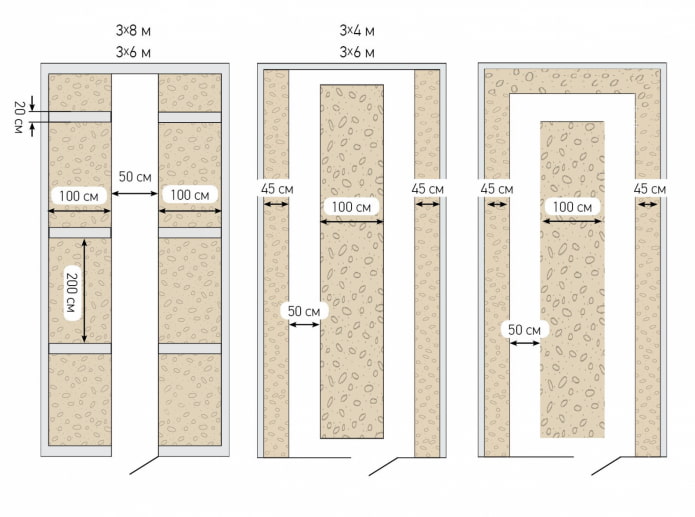
Suitable for dimensions 3 * 6 (3 * 4, 3 * 8 m) 3 bed schemes in the greenhouse:
- Parallel... Arrangement of two beds (100-120 cm) of rectangular shape along the long sides at the edges, a wide passage (60-100 cm) between the rows.
- Triple... Inside there are 3 beds: wide (100-120 cm) in the center, 2 narrow (40-50 cm) along the walls. 80-120 centimeters will remain on the paths in the aisles. Another option is three rows of the same width (60-70 cm).
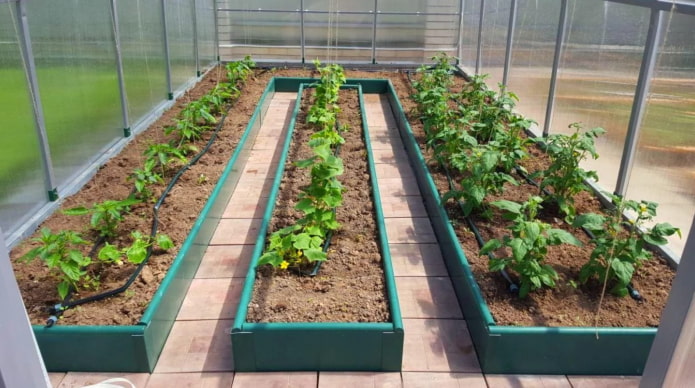
- U-shaped... The dimensions are the same as the previous one, but two parallel extreme ridges are united by a jumper in the far part of the greenhouse (look at the photo). A place for paths 0.8-1.2 m wide is also left with the letter P.
Important! A garden bed in a greenhouse should not exceed 1.2 m in width (central), 1 m (lateral) is the optimal size that allows you to take care of plants from the aisle.
Keep in mind: the deeper the depth from the entrance to the far wall (the longer the greenhouse), the easier planning is to be used.In 6-8 meter narrow greenhouses, arrange the beds on two sides, leaving the center part free for better air circulation.
Advice! If you use a garden wheelbarrow in your work, measure its width first. The distance between the ridges must be sufficient for driving.
When planning to install a greenhouse, try place it in the direction from west to east: in this case, the grown crops will receive enough light. Is the greenhouse already installed from north to south? The beds in the greenhouse should be arranged in such a way that the high plantings are in the north.
How to do it yourself?
For those with theoretical knowledge, the arrangement of the beds in the greenhouse will not be difficult. The instructions differ only slightly from each other, depending on what material you plan to use.
Wood
For work will need:
- the boards themselves;
- timber as support posts;
- saw or jigsaw for cutting;
- roulette;
- pencil;
- fasteners (nails, screws);
- screwdriver or screwdriver;
- mallet.
Step by step instruction:
- Preparation... First of all, we measure the required dimensions of the boards (2 along the length of the greenhouse, 2 in width), bars (board height + 25 cm), saw off. The surface must be sanded (to prevent splinters from getting into the arm or leg), soaked with a protective compound (from moisture and insects). The preparatory phase takes most of the time.
- Assembly... Punch a box out of the boards, install the bars-legs in the inner corners. On the long side, you can additionally fix 1-2 bars for a secure base.
- Installation... Place the box with protruding bars to the ground, push, knock with a mallet, sinking the legs into the ground. If the soil is dense, it is more convenient to set the bed with a shovel.
It remains to add a layer of humus, fill up the soil and you can plant seedlings.
Slate
A set of tools and materials slightly different:
- sheets of flat slate of the required height;
- profile pipe;
- drill;
- drill with a victorious tip or for metal;
- roofing screws;
- grinder or circular saw.
All there is to do:
- cut slate strips of the required size,
- drill holes for self-tapping screws,
- screw the sheets to the profile, leaving 2-3 mm of free pipe edge from above to drive the structure into the ground.
Important! If the box is long enough, it is recommended to reinforce it with metal crossbars in 1-3 places.
For an example of a flat slate bed, see the video:
In addition to ordinary beds, there are also special warm: they are characterized by easy maintenance, fast plant growth and good harvest. The height of a warm bed is 50-70 centimeters, which is convenient in an open area, but not practical in a greenhouse.
Since greenhouse structures have edges that are slightly inclined or beveled towards the top, a high box cannot be installed close to the wall. And growing seedlings will be uncomfortable in cramped conditions.
Therefore, a trench option is chosen for greenhouses: a trench is dug about half (25-35 cm) of the total height, due to which the ground section turns out to be a standard 30 cm. The upper box can be assembled from scrap materials.
The difference between a warm ridge and an ordinary ridge is not a fence, but an internal filling.
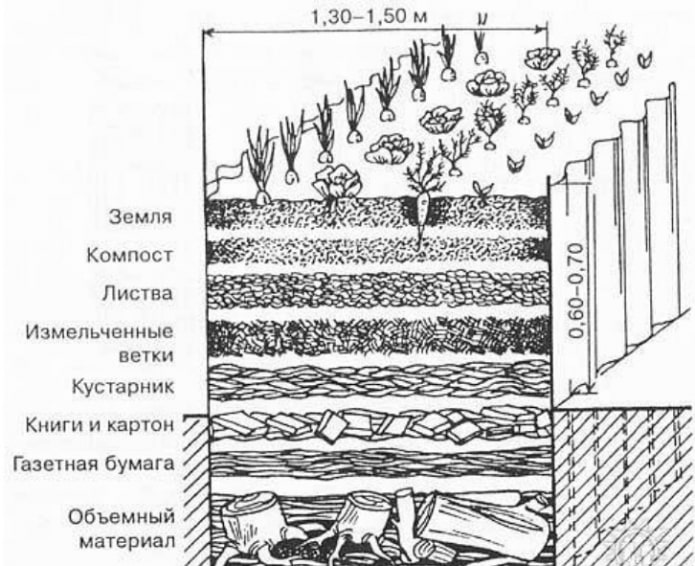
Collect a warm bed layer by layer:
- Protection... The metal mesh at the bottom will prevent small rodents from eating greenhouse vegetables.
- Drainage... Large and small branches are a natural drainage material that prevents water from stagnating and roots from rotting. In addition, the branches retain and generate heat. It takes up about half of the entire height.
- Organic... Occupies most of the remaining land, is a storehouse of nutrients for future plants. First of all, newspapers or cardboard are laid on top of the drainage - they will not allow the fine fraction of the compost to crumble down, will preserve the "airiness" of the filler. Further, we move from large to small layer by layer: branches, foliage, humus.The ready-made compost between the soil and non-decayed organic matter not only gives nutrients up to the green inhabitants, but also triggers the decomposition processes from below.
- Priming... The very last layer is quite thin - about 20% of the total height - that is, 10 centimeters from the half-meter ridge. You can fill in the soil dug from the trench, or purchase the land separately: the purchased mixtures differ in their nutritional composition, they are suitable for growing horticultural crops in greenhouses.
When arranging the beds, do not forget about fertilizers..
- Radiance... Microbiological fertilizer from the BakSib company, which starts the processes of decay.
- Ash... Alkalizes overly acidic soils.
- Manure... Natural "warmer" of the soil.
- a piece of chalk... Strengthens the roots, protects against bactericidal infection.
Growing crops efficiently in a greenhouse is not luck, but a competent organization. Applying the information from this article, you can be sure that any plants will not only grow well, but also bear fruit abundantly.

 10 practical tips for arranging a small kitchen in the country
 12 simple ideas for a small garden that will make it visually spacious
 What can you save on when renovating your summer cottage?
  Houses with panoramic windows: 70 best inspiring photos and solutions
 Brick facades of houses: photos, advantages and disadvantages
 Siding house facades: features, photos
 Terrace design in a private house in the Moscow region
 Provence style house design in Moscow region